Yesterday’s bake.

Fed my starters Thursday and just tossed 80g of the discard into:
1000g of flour.
660g water (66% hydration)
1g of yeast (basically just a pinch)
15g of salt.
I have had to reduce the salt in our breads due to Moe’s reduced sodium diet,
so instead of the 30gs I used in the past I now use 15g and we really haven’t noticed a difference.
I share a lot of my breads and no one has noticed a difference either.
Dough went into the fridge Thursday morning after the last stretch and fold, and was taken out Thursday night after 8:00 and left on the counter overnight.
Was ready to start shaping at 4:00 AM.
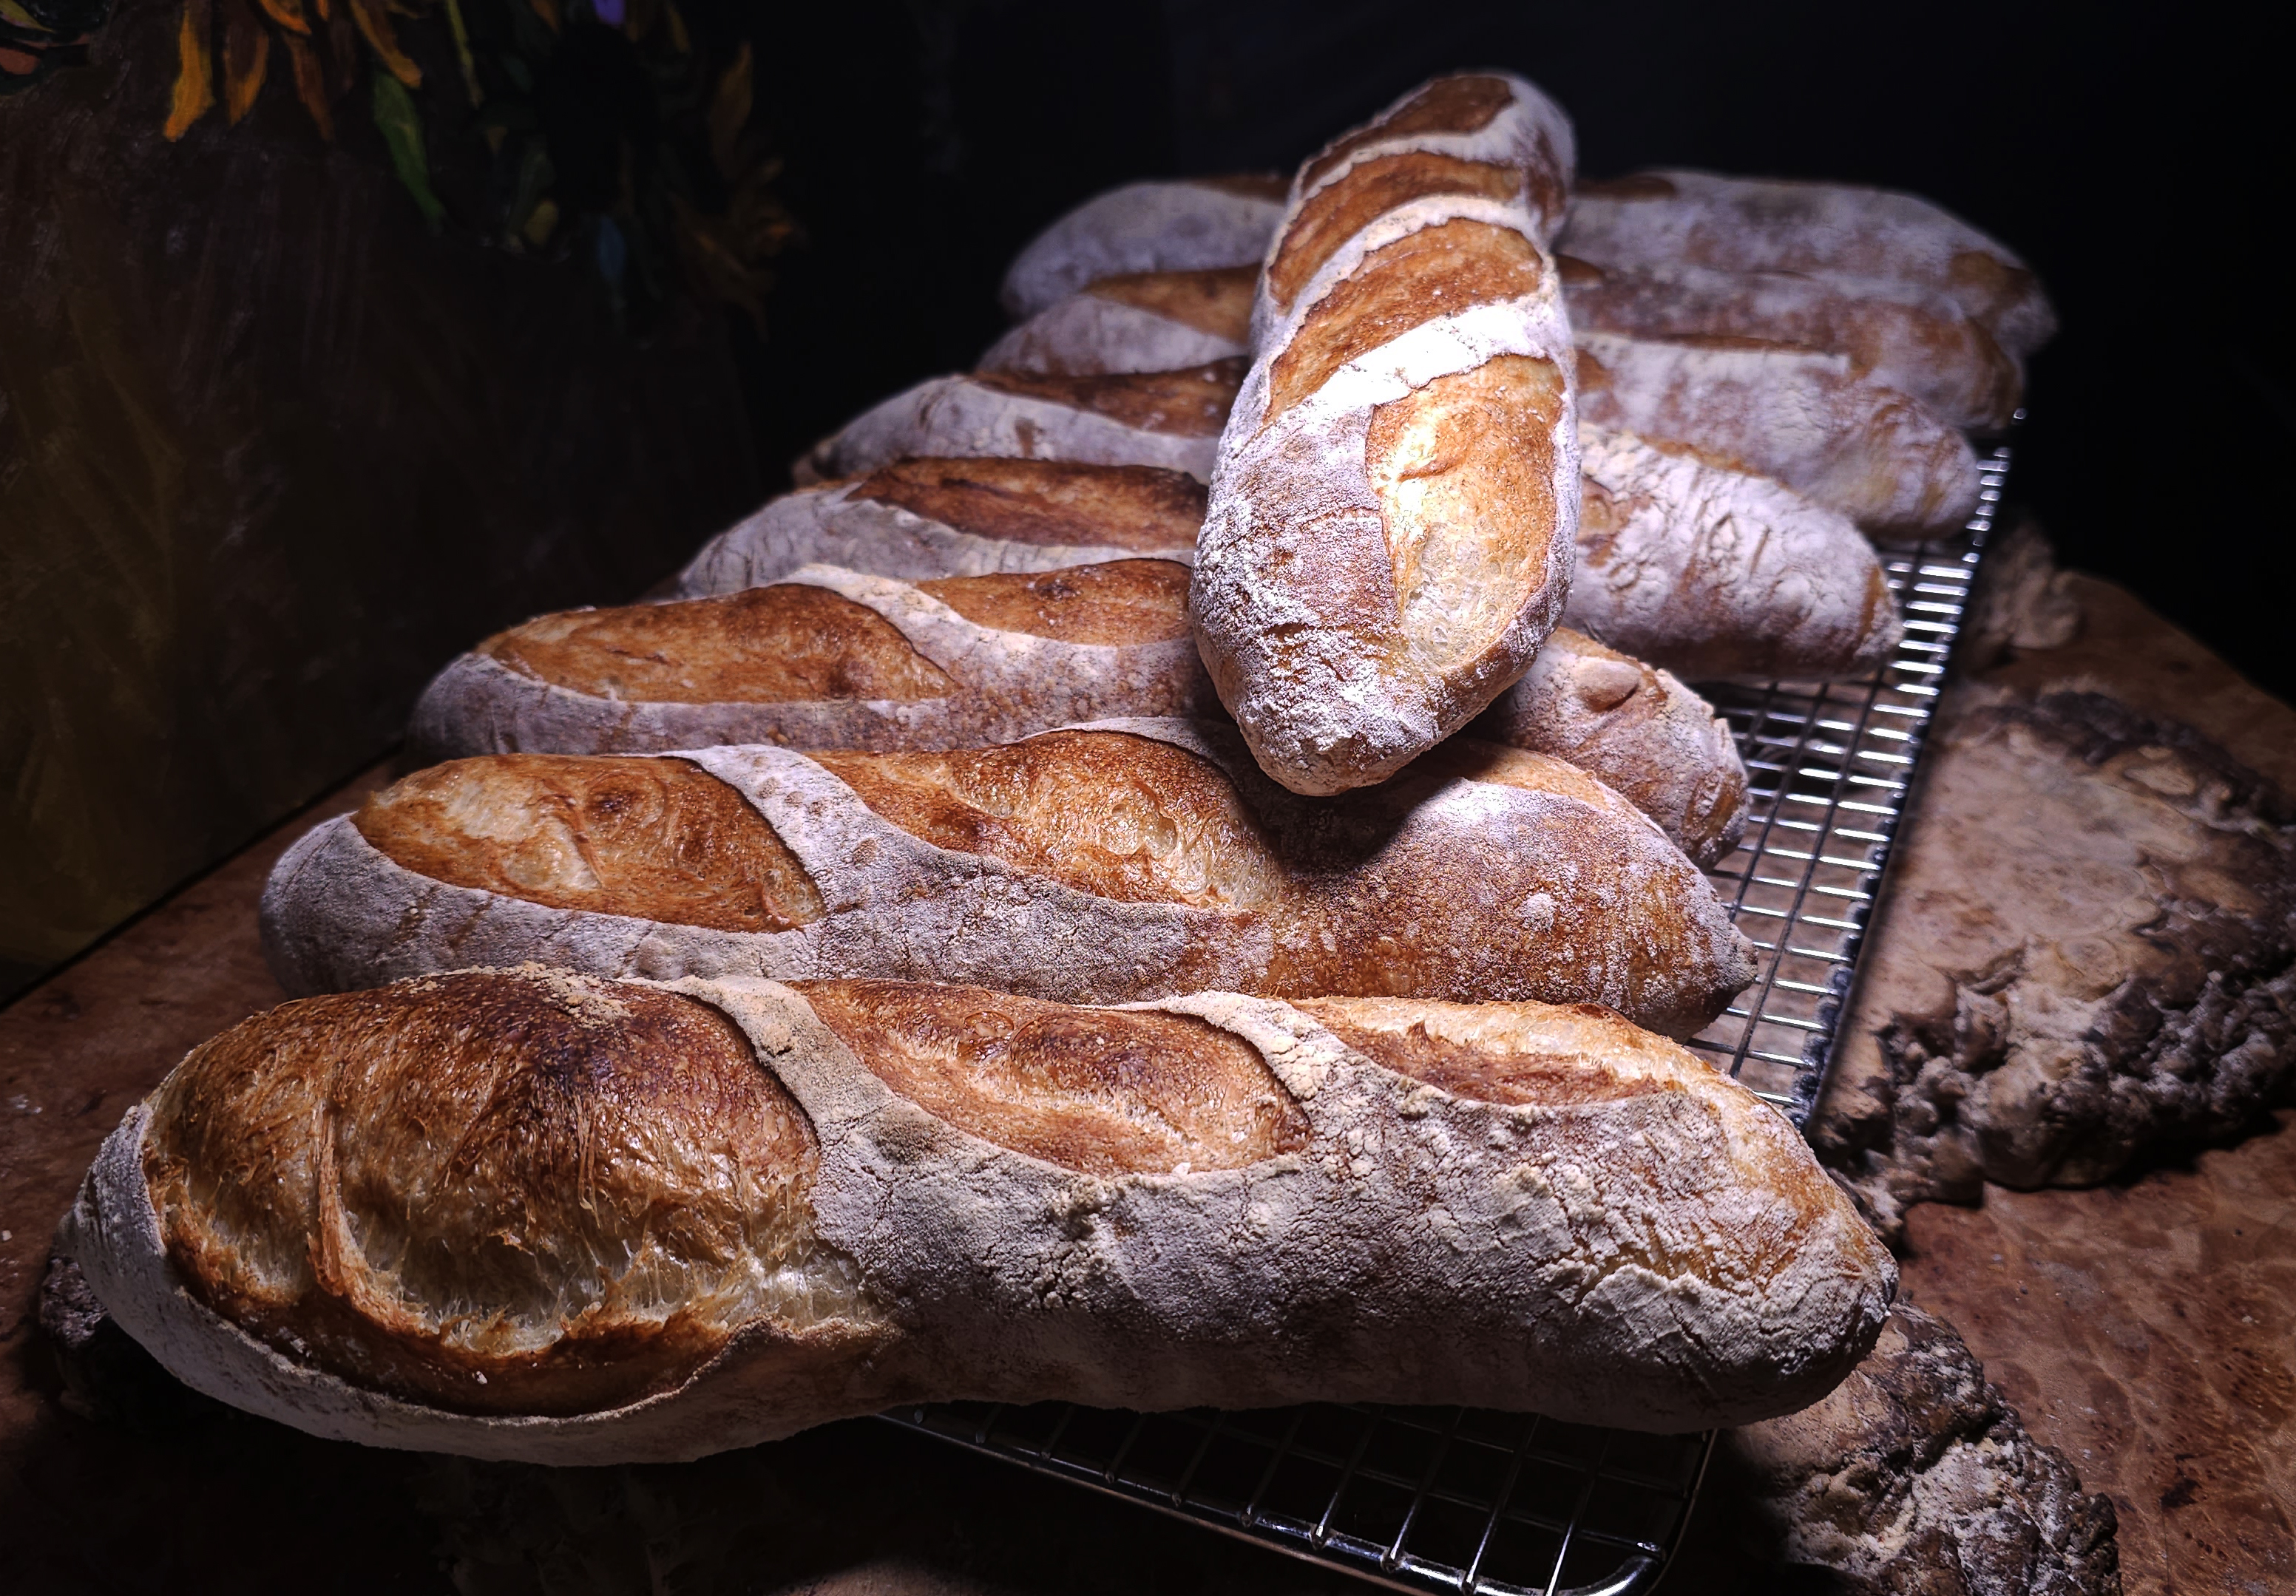
Baked 8 smaller size baguettes – 11″ to 14″.
I had enough discard left to make two Levains.
LEVAIN (PREFERMENT)
55g of of discard
55g of water (add more water if needed)
142g of flour
Mix together and knead (I use the stretch and fold method) into a small
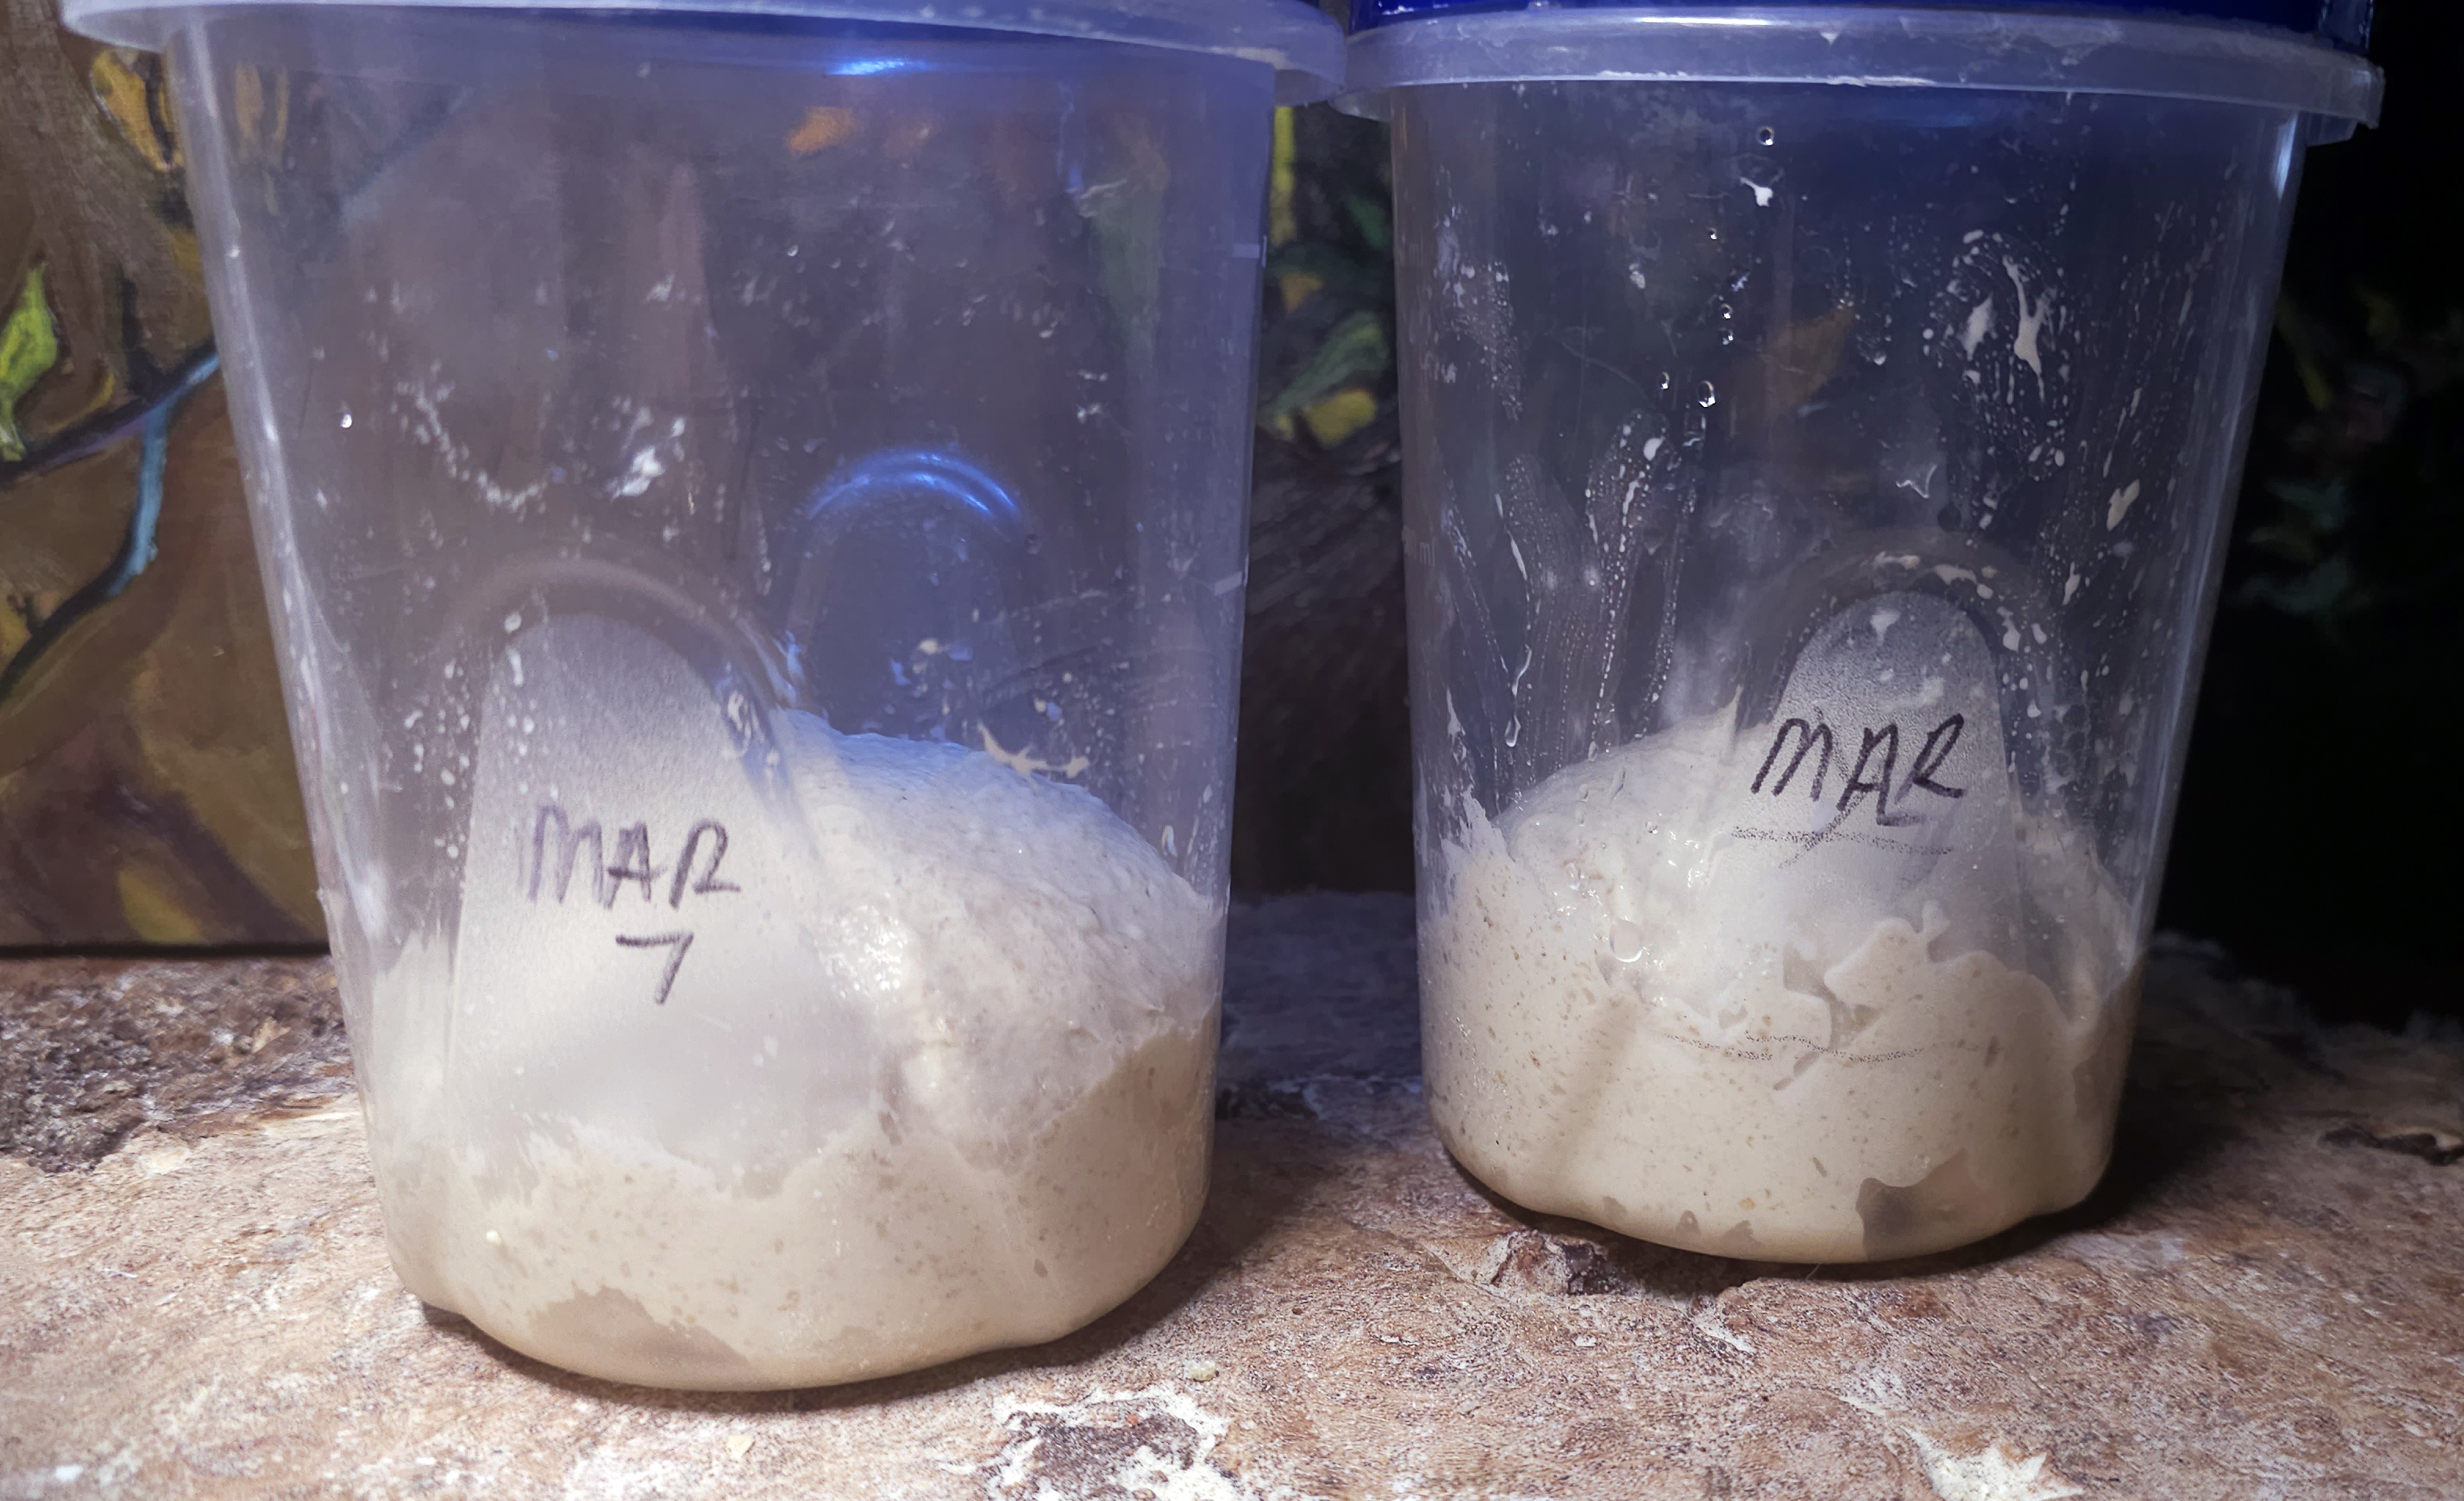
ball and place in a container to rise.

Both Levains had more than tripled by the time I got home.
Put one in the fridge for another day, and I pulled the other out of the container and started another batch of dough which will get baked over the next couple of days.
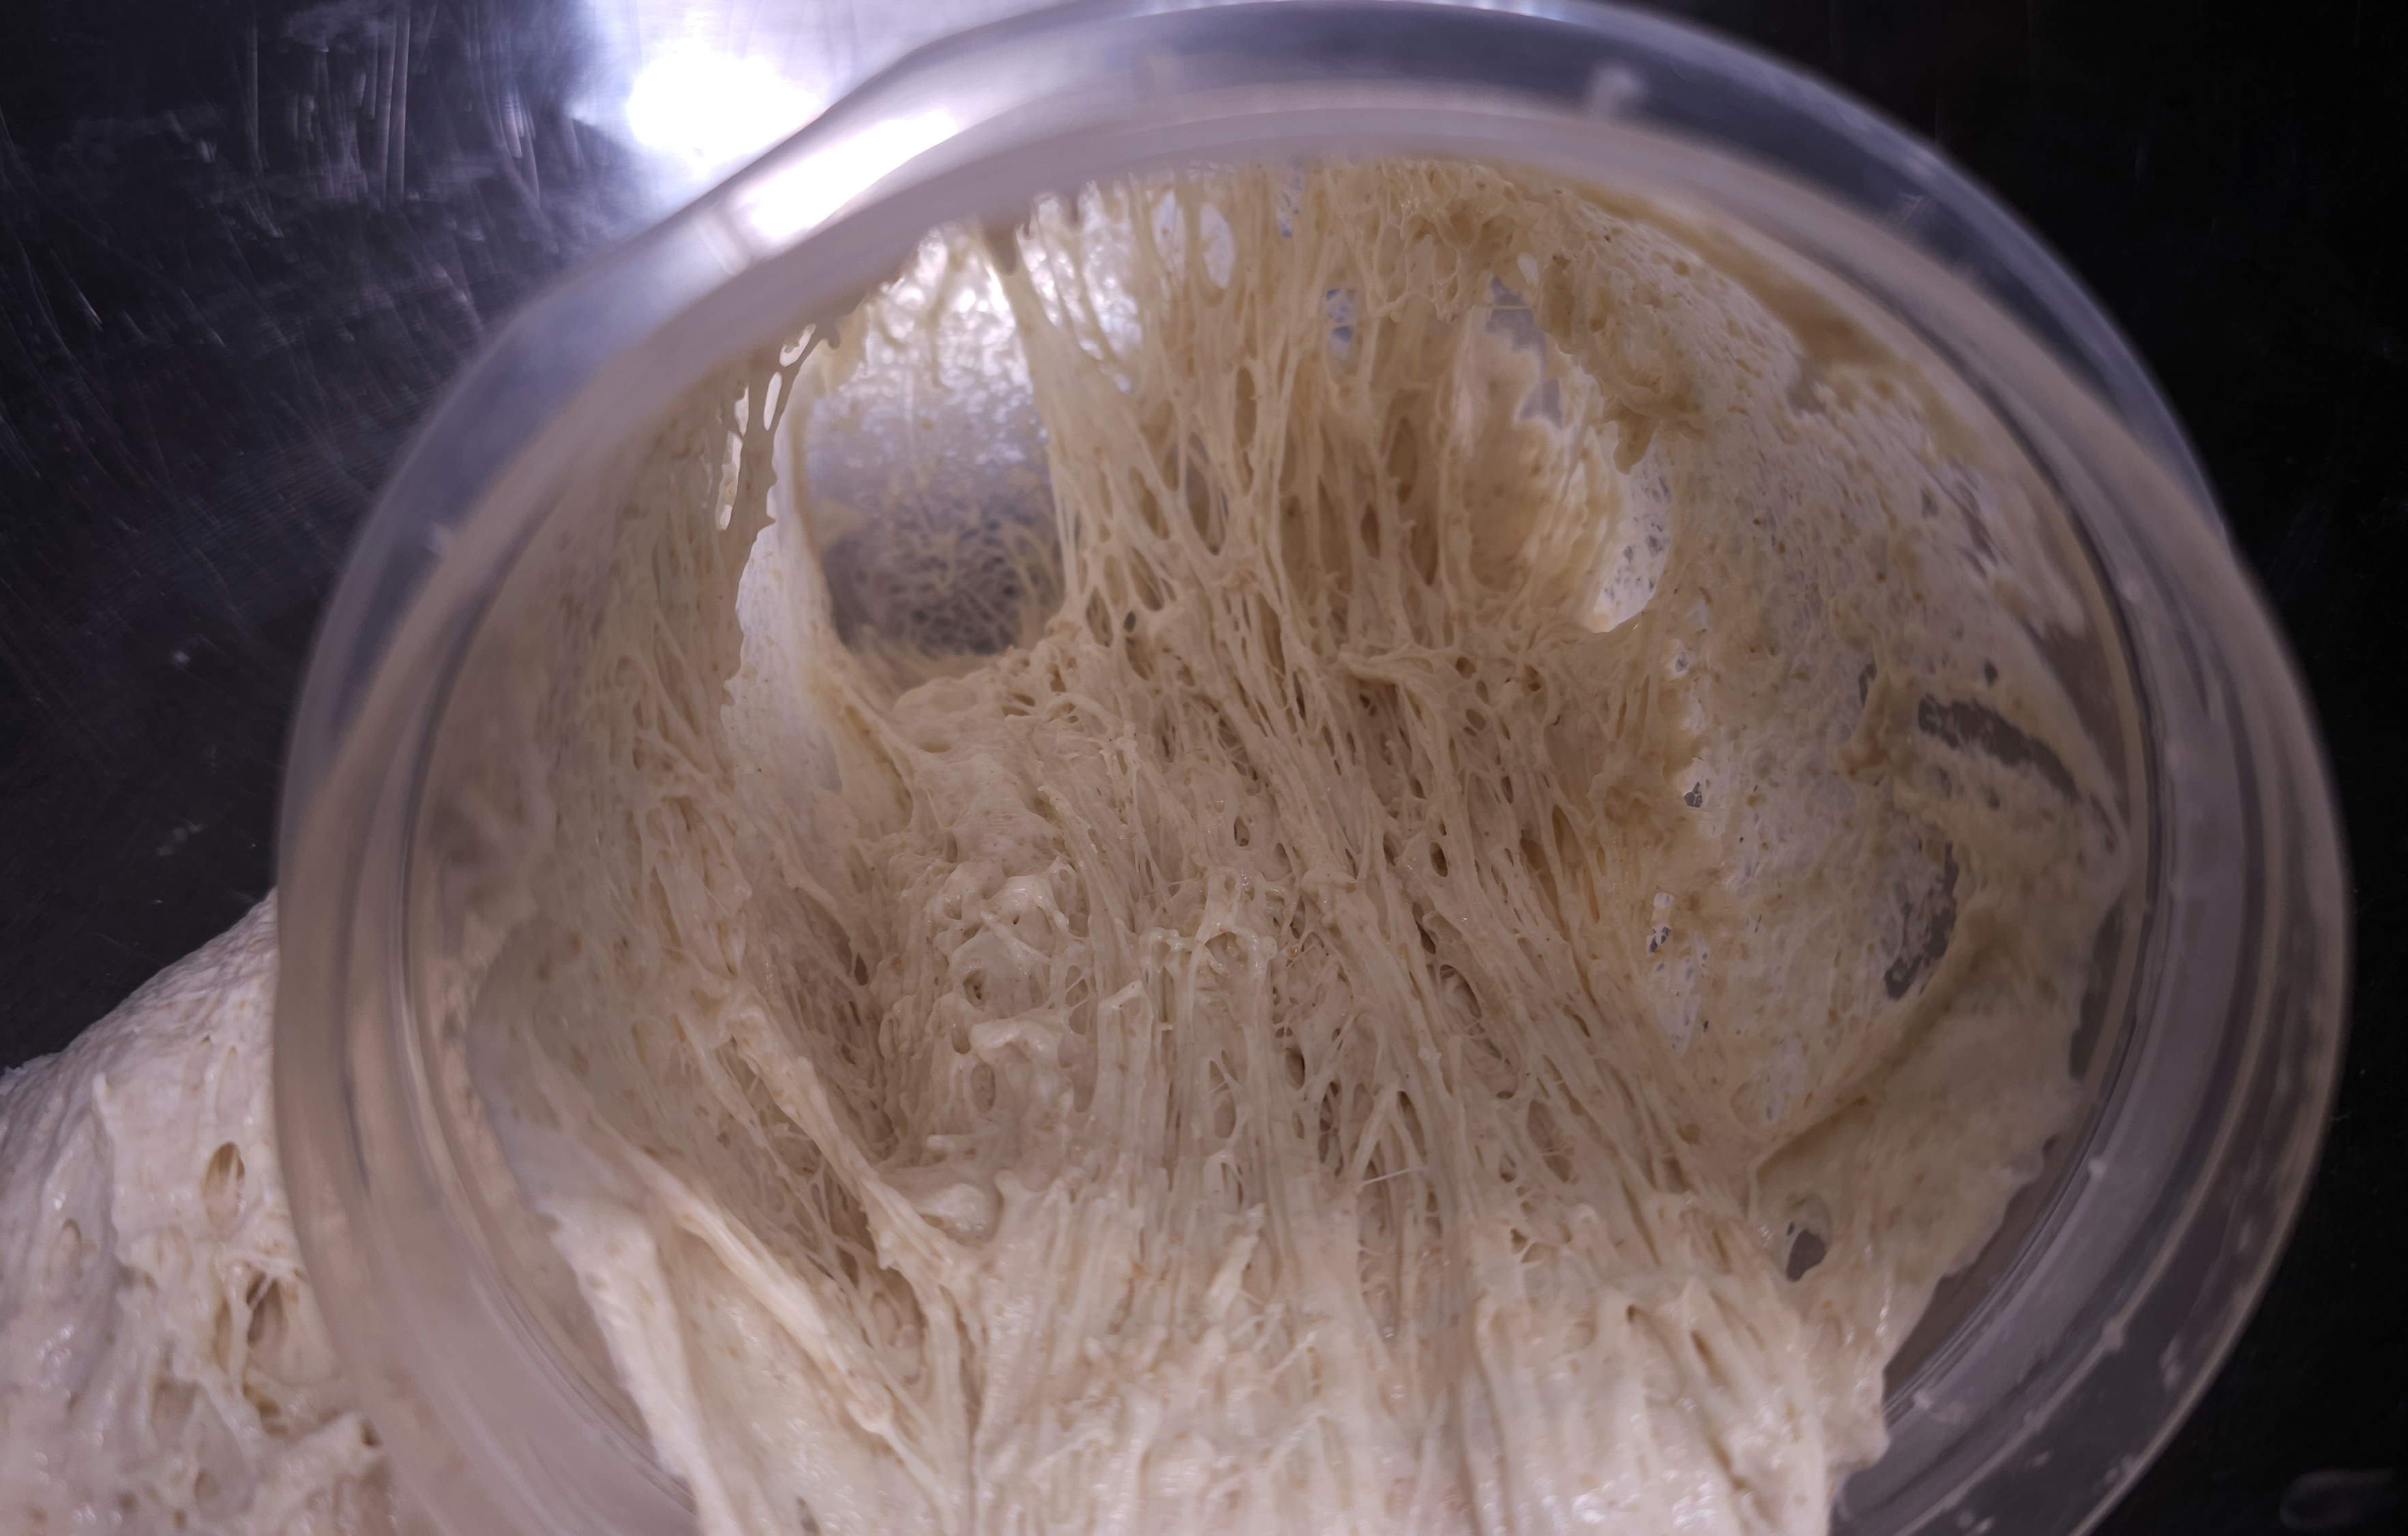
Took a photo to show the strands of gluten.
Instructions to making your own Sourdough Starter.
Sourdough Starter – Amy’s Bread
Source: countrylife.net
RYE STARTER
From AMY’S BREAD
This starter is begun with rye flour because rye just LOVES to
ferment and is an easier starter to get going than a wheat
starter. When I first made it, it had a bubble or two within a
couple hours.
The procedure is to start it with rye flour, then transform it by
changing what you feed it. The original rye will dilute to nothing
over time and you’ll end up with a white flour (or whatever other
grain you choose, it could be whole wheat or pumpernickel, or you
could leave it as a rye starter) and water based starter, but it
had the advantage of beginning it’s life from highly fermentable
rye flour.
Start it with organic rye flour and spring water. Once you have it
going well you can switch to all-purpose white (or other) flour as
you choose. The use of spring water is recommended for
maintenance, however, as tap water may contain elements (such as
chlorine) which may be detrimental to the health of your starter.
I also recommend that you use a container that you can mark the
volume levels of starter each time, so that you will know when it
has doubled. Use a marking pen or tape or any other means to
indicate on the container the starter levels each time you feed.
Phase 1 – Combine 2 oz organic rye flour (room temp) with 4 oz
spring water in a clear container. The batter should be about the
consistency of very thick pancake batter, add more water or flour
if necessary. Cover & let it sit for 36 – 48 hours at 75 – 77
degrees (a little cooler is okay but over 80 you will incubate the
wrong kind of bacteria and your culture will have an unpleasant
bitter taste). You should start to see tiny bubbles forming after
about 24 hours. By the time it has doubled, there will be a
noticeable network of small bubbles throughout the batter & it
will be foaming & bubbling on top. (If the batter has not doubled
within 48 hours, feed with 2 oz water & 2 oz flour (add more of
either if necessary for the consistency) and let it sit another 24
hours or until you see some definite activity.)
Phase 2 – Stir the culture down, notice how soupy it’s become. The
batter should have a noticeable sour smell & a mildly tangy taste
at this point. Add 2 oz water & 2 oz flour and stir vigorously
until well-combined. Let it sit for 12 hours. It should be showing
a fair amount of activity at this point. You should see lots of
foaming & bubbling through the sides as well as on the top. Don’t
be concerned if the culture deflates & loses volume. This means
the yeast has exhausted its food supply, but it will continue to
increase in acidity. Don’t worry if your culture dramatically active yet.
As long as there is some noticeable activity going on and the mixture
smells & tastes sour, you’re on the right track.
Phase 3 – The culture should now have a pronounced, sour, fruity
taste and smell, it should not taste musty or bitter (if it does,
discard and start again, paying close attention to the temp of the
culture at all times). Now you can start “transforming” it into a
white (or other) flour based starter.
Use 6 oz (172g) of the starter, add 3 oz (86g ) water & 3 oz (86g) flour, stir vigorously. Let it sit for 12 hrs at
75 – 77 degrees F.
Refresh it again, setting up a maintenance level of 12 oz of
starter. This will be your “mother” starter that you use to build
the sourdough starters/sponges needed in individual recipes.
Each time you take part of the mother out to build a starter, you
must refresh it with equal weights of flour and water to bring it
back up to its maintenance level.
To maintain – Use 6 oz of the mother culture (discard the rest),
add 3 oz water and 3 oz flour, stir vigorously, let it sit at room
temp until doubled in volume.
A strong mother will double in 8-12 hours. If yours doesn’t do
that, let it continue to sit out until it has a nice tangy taste
and smell; discard all but 6 oz and repeat this procedure. Repeat
this procedure as many times as necessary until the mother doubles
within 8-12 hrs. It may take several days. Don’t get discouraged,
it’s worth the effort.

I have been enjoying your blog about your journey in baking. May I ask what is your bread baking oven setup is for 2024?
Hi Tammy, Thank you. I have a LG oven which I keep a stone in to bake bread on, and I have a steel that I leave on the bottom shelf of my oven to bake pizza on. I also have a Cuisinart Combination Convection and Steam oven that I had a stone cut to fit. This is a small oven, but it has the steam function and a bread setting. So I start all my baguettes in the CSO on the bread setting which automatically adds steam at the beginning of the bake. After the first 10 minutes I transfer the baguettes to the big oven to finish baking. I then add a couple of more baguettes to the steam oven. This allows me to bake 6 to 8 baguettes , two to three at a time, in half the time, using both ovens. And each loaf gets the benefit of steam. If I must baking one or two baguettes, I bake from start to finish in the CSO, on the bread setting. After the initial steam, the oven automatically finishes baking without steam.